Excelで表を使った顧客管理ソフトを作ってみよう
Step 12 はがき印刷
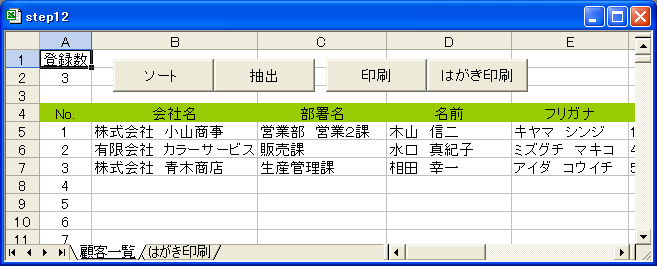
顧客一覧シートに「はがき印刷」ボタンと「〒」列を追加しています。
顧客の印刷は下記の流れで行っています。
1)シェイプの枠線を消去
2)カーソル行のデータをシェイプにセット
3)印刷プレビュー
4)シェイプの枠線を戻す
顧客の印刷は下記の流れで行っています。
1)シェイプの枠線を消去
2)カーソル行のデータをシェイプにセット
3)印刷プレビュー
4)シェイプの枠線を戻す
Homeへ > Excelでアプリケーションソフト2 > 顧客管理ソフトを作ってみよう
シートのVBAコード
下記のVBAコードを追加してください。
Private Sub CommandButton4_Click()
'印刷の開始処理
ExPrintReady True
'印刷の開始
ExPrintStart
'印刷の終了処理
ExPrintReady False
End Sub
Private Sub ExPrintDataSet()
Dim i As Integer
Dim n As Integer
Dim dat As String
Dim s As String
Dim drow As Long
drow = ActiveCell.Row
'宛先郵便番号
n = 1
dat = ActiveSheet.Cells(drow, 6)
For i = 1 To 8
s = Mid(dat, i, 1)
If s <> "-" And s <> "-" Then
Sheets("はがき印刷").Shapes("〒" & n).TextFrame.Characters.Text = s
n = n + 1
End If
Next
'住所1、住所2
dat = ActiveSheet.Cells(drow, 7)
s = ActiveSheet.Cells(drow, 8)
If s <> "" Then
dat = dat & vbCrLf & s
End If
dat = Replace(dat, "-", "│")
dat = Replace(dat, "-", "│")
Sheets("はがき印刷").Shapes("宛先住所").TextFrame.Characters.Text = dat
'名前
dat = ActiveSheet.Cells(drow, 2) & vbCrLf & ActiveSheet.Cells(drow, 3) & vbCrLf
dat = dat & ActiveSheet.Cells(drow, 4) & " " & ActiveSheet.Cells(drow, 13)
Sheets("はがき印刷").Shapes("宛先名前").TextFrame.Characters.Text = dat
End Sub
Private Sub ExPrintStart()
Dim lrow As Long
Dim j As Long
CommandButton1.Enabled = False
CommandButton2.Enabled = False
CommandButton3.Enabled = False
CommandButton4.Enabled = False
ExPrintDataSet
Sheets("はがき印刷").PrintPreview
CommandButton1.Enabled = True
CommandButton2.Enabled = True
CommandButton3.Enabled = True
CommandButton4.Enabled = True
End Sub
'印刷の開始処理と終了処理
Private Sub ExPrintReady(sw As Boolean)
Dim t As Object
Dim s As String
Dim i As Integer
For Each t In Sheets("はがき印刷").Rectangles
'シェイプの名前
s = t.Name
'不必要なシェイプを消す/戻す
If Left(s, 3) = "ガイド" Then
'表示
t.Visible = Not sw
Else '枠線を消す/戻す
t.ShapeRange.Line.Visible = Not sw
End If
Next
If sw = False Then
Sheets("はがき印刷").Shapes("宛先住所").TextFrame.Characters.Text = "宛先住所"
Sheets("はがき印刷").Shapes("宛先名前").TextFrame.Characters.Text = "名前"
For i = 1 To 7
Sheets("はがき印刷").Shapes("〒" & i).TextFrame.Characters.Text = i
Next
End If
End Sub
顧客一覧画面
印刷したいデータ行にカーソルを移動し、「はがき印刷」ボタンをクリックすると印刷プレビューを実行します。
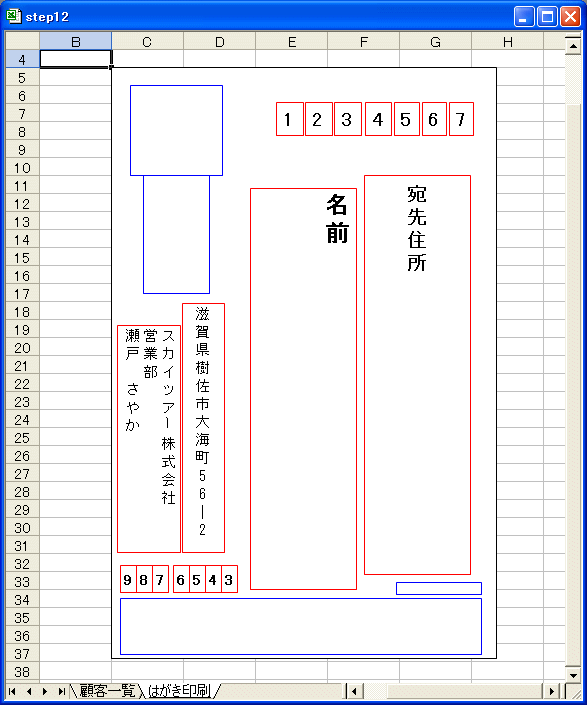
[はがき印刷]シート
・全体の印刷位置、郵便番号位置は通常のシェイプ設置と同じように調整してください。
・差出人住所、差出人氏名はシェイプ内にテキスト入力してください。
・シェイプの枠線は印刷時、自動的に消去されます。

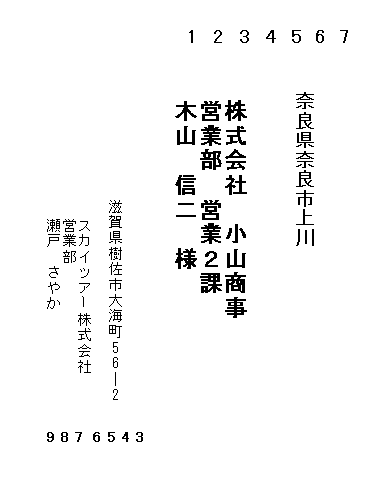
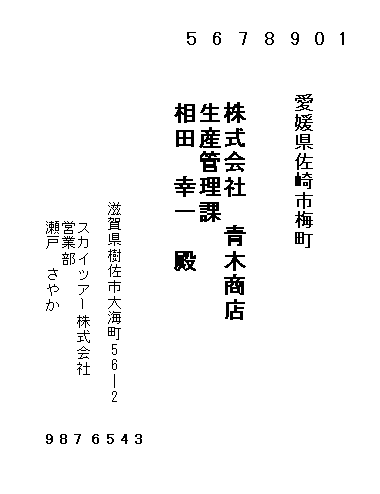
印刷結果


Homeへ > Excelでアプリケーションソフト2 > 顧客管理ソフトを作ってみよう
■■■
このサイトの内容を利用して発生した、いかなる問題にも一切責任は負いませんのでご了承下さい
■■■
当ホームページに掲載されているあらゆる内容の無許可転載・転用を禁止します
Copyright (c) Excel-Excel ! All rights reserved